
AWS Elastic Beanstalk is an easy-to-use service for deploying and scaling web applications and services developed with Java, .NET, PHP, Node.js, Python, Ruby, Go, and Docker on familiar servers such as Apache, Nginx, Passenger, and IIS.
AWS customers gain numerous benefits for moving or building new applications using Elastic Beanstalk. These include capacity provisioning, load balancing, auto-scaling, and application health monitoring. At the same time, customers retain full control over the AWS resources powering their application and are able to access the underlying resources at any time.
AWS Elastic Beanstalk if free to use and AWS customers only pay for the underlying AWS resources used to store and run the application.
AWS customers have two options for getting started with Elastic Beanstalk:
- Re-host: This is the fastest option. No code changes are required, and it needs less testing and migration time. Re-hosting does not use all the features of the cloud like multi-AZ for high availability. The DB stays on-premise and the .NET app is moved to EC2 using Elastic Beanstalk.
- Re-platform: In this method, the DB server is migrated to the cloud using manual backup and RDS SQL. A manual backup for the SQL server must be created first and then restored into the newly created RDS. Next, the RDS connection string will be provided to the Application and deployed using Elastic Beanstalk. This approach requires more testing and comparison between the old and new environment.
In this blog we are going to introduce how to move an existing .Net application to AWS using Elastic Beanstalk.
This tutorial will use the following:
- Toolkit for Visual Studio
- Sample ASP.NET Web application that you can download here.
Create a .NET application:
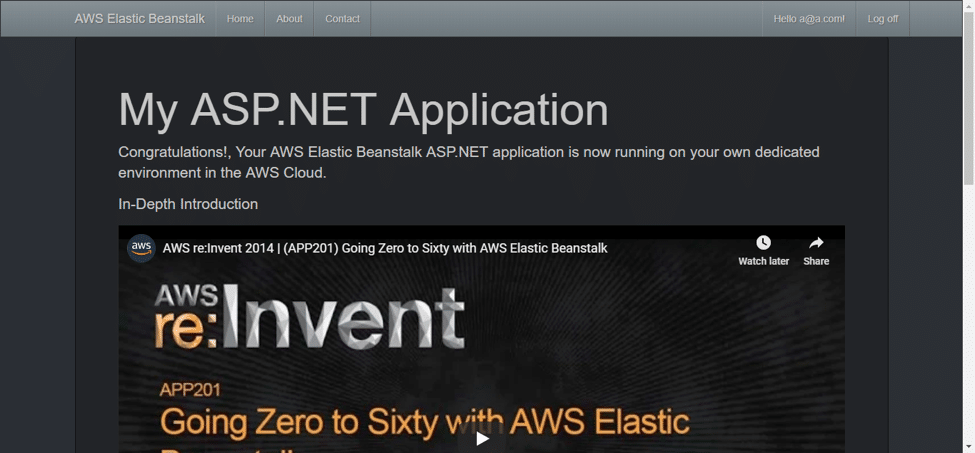
You can use your existing .NET application or create a new one. In this tutorial we are using a sample .NET application that you can download here.
- Download and Verify that the application is running.

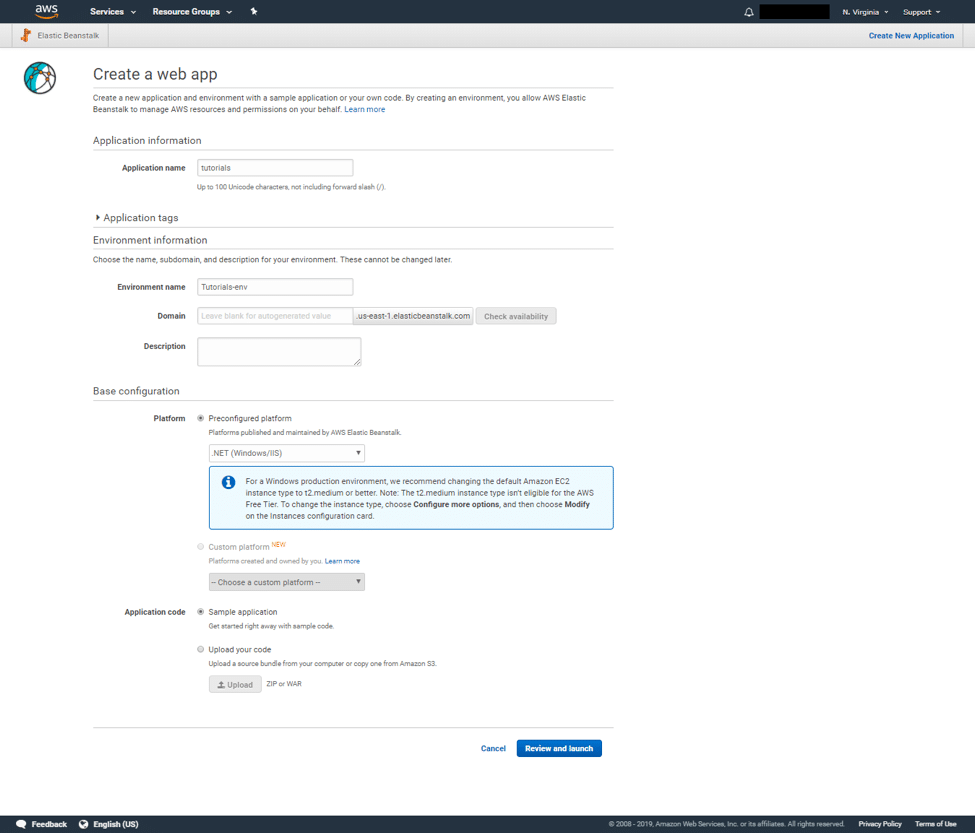
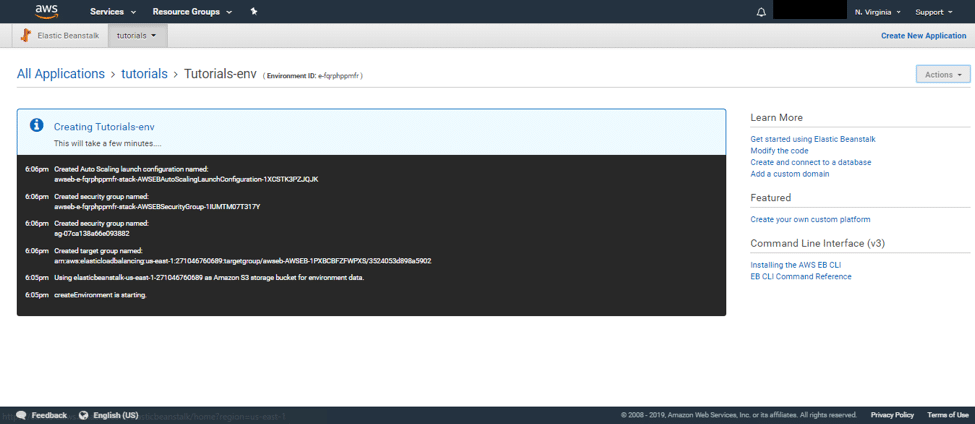
- Create the Environment – We will create an Elastic Beanstalk environment to deploy the application to AWS. Login to your AWS console and use the Create New Application wizard in the Elastic Beanstalk console to create the application environment. For Platform, choose .NET.
To launch an environment (console):
- Open the Elastic Beanstalk console using this preconfigured link: aws.amazon.com/elasticbeanstalk/home#/newApplication?applicationName=tutorials&environmentType=LoadBalanced
- For Platform, choose the platform that matches the language used by your application.
- For Application code, choose Sample application.
- Choose Review and launch.
- Review the available options. When you’re satisfied with them, choose Create app.
When the environment is up and running, add an Amazon RDS database instance that the application can use to store data. For DB engine, choose sqlserver-ex.
Add a DB instance to your environment:
- Open the Elastic Beanstalk console.
- Navigate to the management page for your environment.
- Choose Configuration.
- On the Database configuration card, choose Modify.
- Choose a DB engine, and enter a user name and password.
- Choose Apply.

Modify the connection string in the application to use the new created RDS and verify that its working as expected. In most cases you want to migrate the existing database to RDS. For more information on this, see here, here, or here.
Deploy the application to AWS using AWS Elastic Beanstalk
- In Visual Studio, open sln.
- Note: If you haven’t done so already, you can get the sample here.
- On the View menu, choose Solution Explorer.
- Expand Solution ‘BeanstalkDotNetSample’ (2 projects).
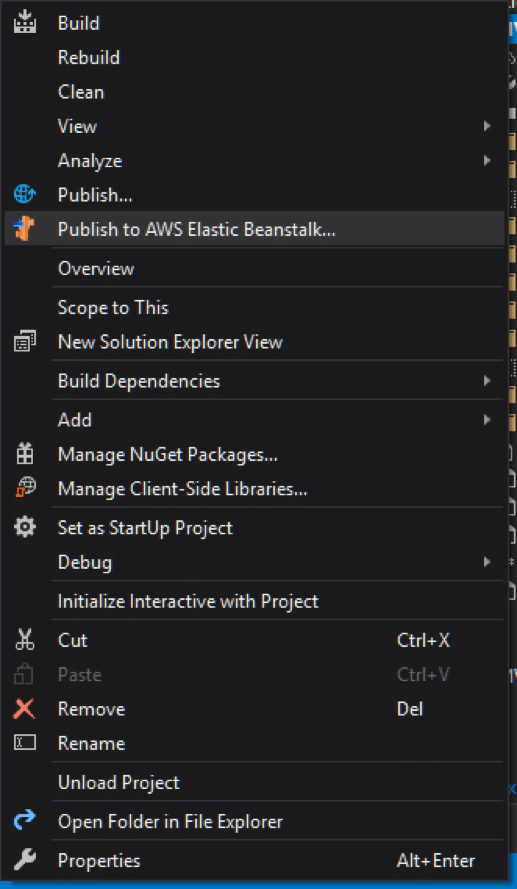
- Open the context (right-click) menu for MVC5App, and then choose Publish to AWS.

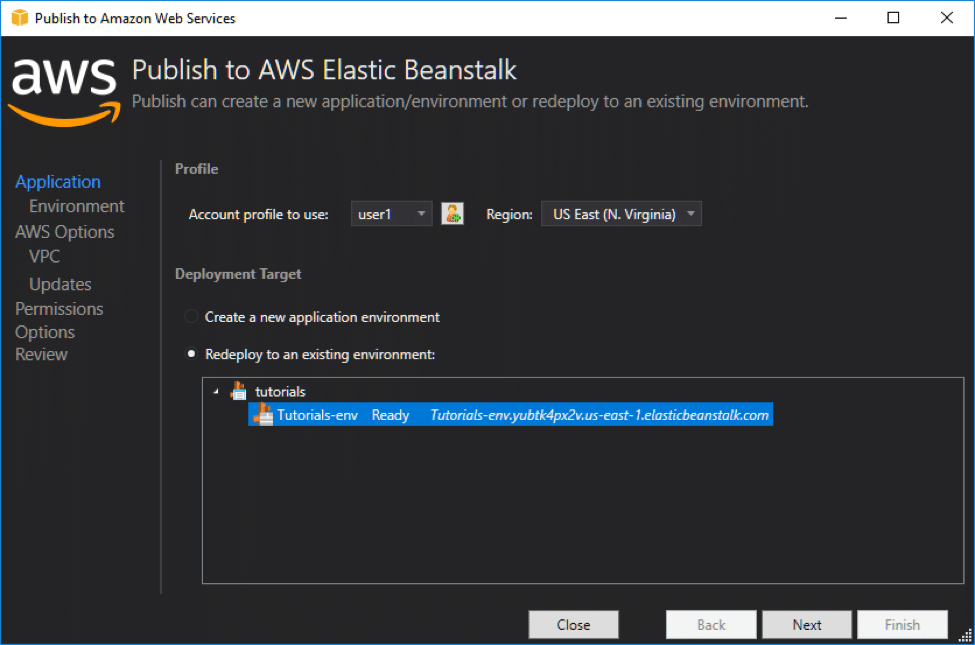
- Add your AWS account credentials by selecting Account profile to use.
- Select redeploy to an exiting environment. You should see the created AWS Beanstalk profile.

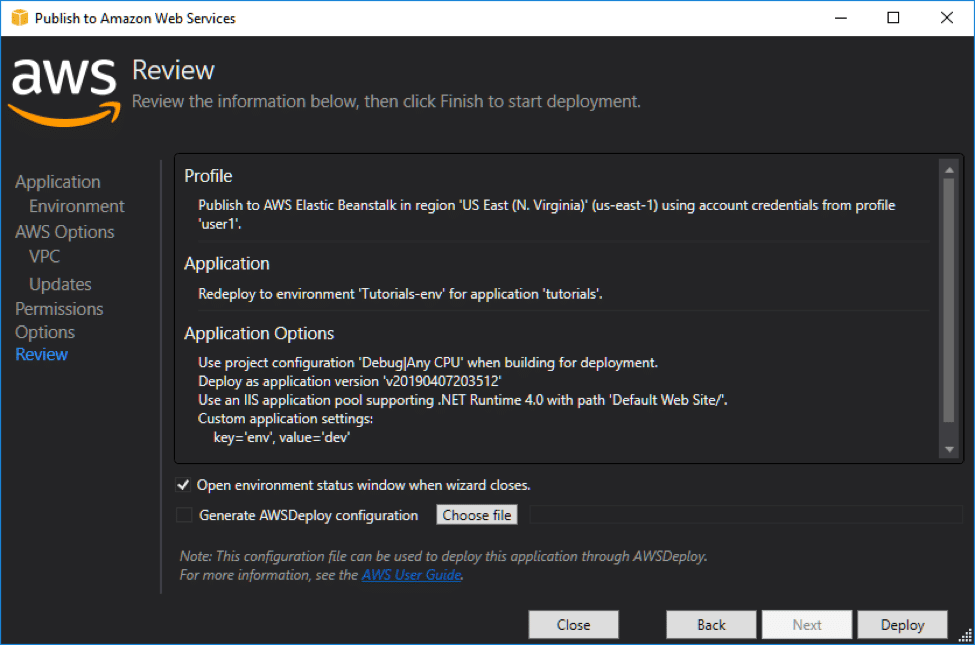
- On the Application Options page, accept all of the defaults, and then choose Next.
- On the Review page, choose Deploy.

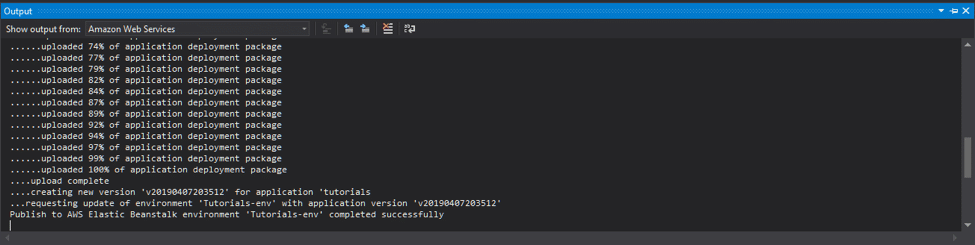
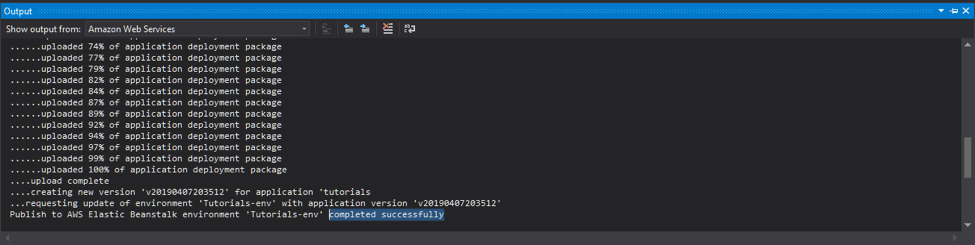
- Monitor the deploying status on the output box.

- When the application has successfully been deployed, the Output box displays completed successfully.
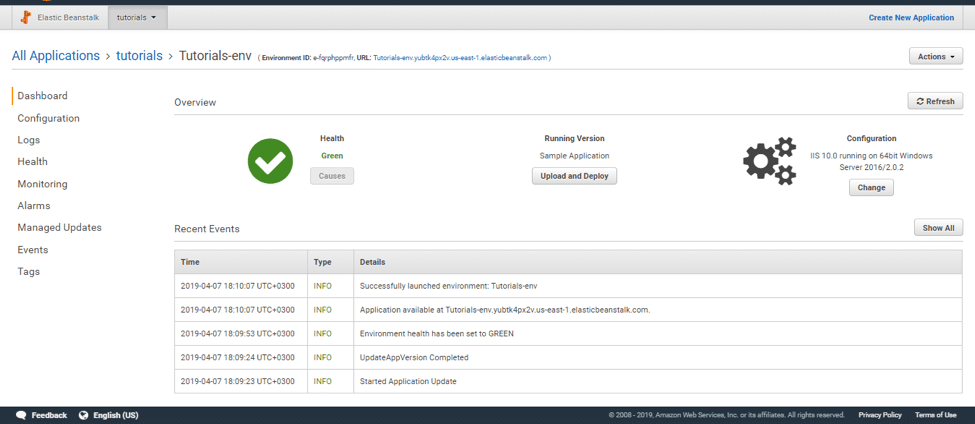
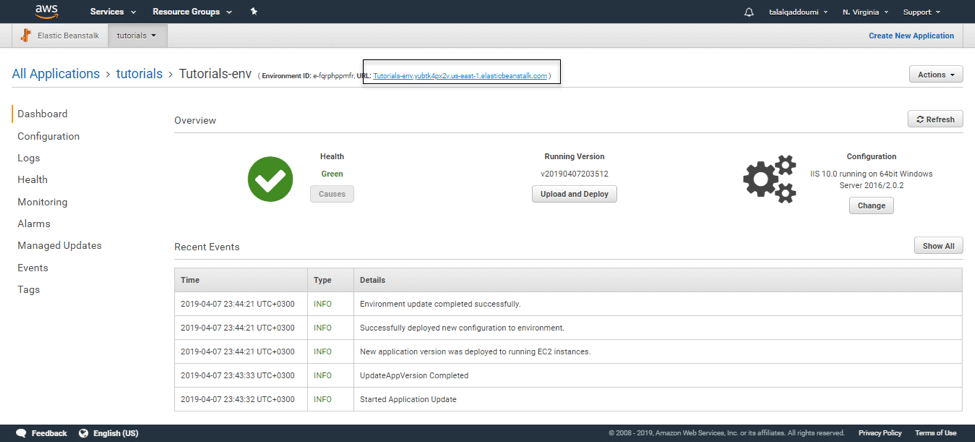
- Return to the AWS Elastic Beanstalk console and choose the name of the application, which appears next to the environment name.

If you follow these simple steps, you can easily migrate your .NET applications to AWS using AWS Elastic Beanstalk.
When you are finished working with AWS Elastic Beanstalk, you can terminate your .NET environment.
How to Terminate your AWS Elastic Beanstalk environment:
- Open the Elastic Beanstalk console.
- Navigate to the management page for your environment.
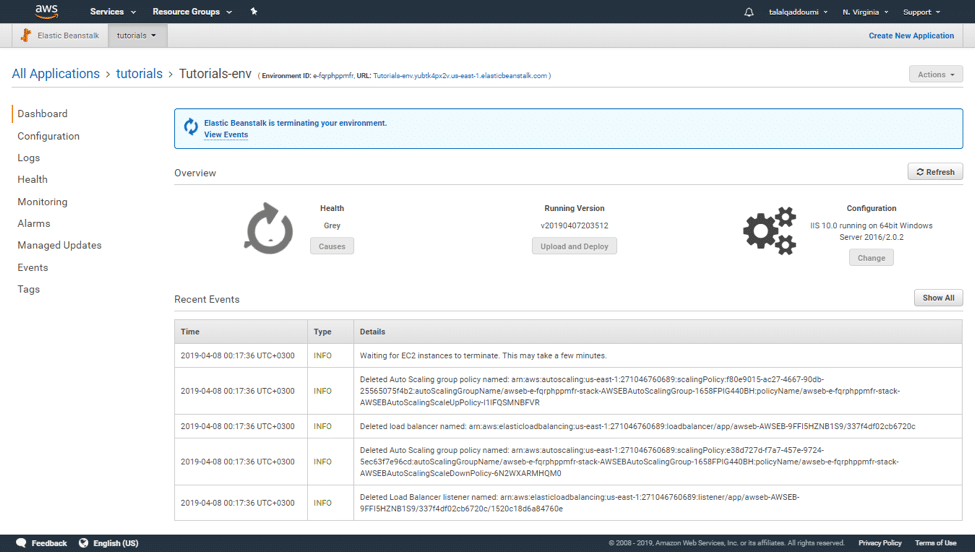
- Choose Actions and then choose Terminate Environment.
Elastic Beanstalk cleans up all of the AWS resources associated with your environment. This includes EC2 instances, DB instance, load balancer, security groups, CloudWatch alarms, and more.
In this tutorial, we created a new .NET application and RDS SQL server and deployed it to AWS using AWS Elastic Beanstalk. Following these steps, you can deploy your existing .NET application and migrate the DB to AWS RDS to get the benefits of high availability and scalability. Alternatively, you can use your existing on-premise database servers and gain the benefits of AWS scalability and highly available EC2 Instances with AWS Elastic Load Balancer, security, live monitoring, and more.
Using AWS Elastic Beanstalk you can easily deploy your applications and monitor them afterwards by viewing the logs. You can then scale up or down based on your application needs.
Did you try this? Was it helpful? Let us know in the comments!